
Sourdough Flour Tortillas (Made With Discard or Not)

Soft, thin flour tortillas that use a splash of sourdough starter for flavor and structure. Roll them paper-thin, cook on a piping-hot skillet, and enjoy fresh or frozen.
This recipe started as a simple mission: turn sourdough discard into something that feels both familiar and a little elevated. I first made these on a rainy afternoon when I had leftover starter and a craving for homemade tortillas. They came out pliable, slightly tangy, and with perfect little brown spots. Since then they have become my weeknight shortcut for tacos, wraps, and impromptu quesadillas. What I love most is how the starter adds a subtle depth without dominating the familiar, comforting taste of a flour tortilla.
There are two nonnegotiables for success: roll the dough as thin as you can and get the skillet very hot. I often use my Le Creuset crepe pan for even heat distribution, but a seasoned cast-iron skillet works just as well. These tortillas can be made with discard or with a fed starter; either way, the dough is forgiving and the process is quick. They bring a warm, tactile satisfaction to the table and are incredibly versatile — from breakfast burritos to cilantro-lime tacos.
Why You'll Love This Recipe
- Uses pantry staples and a small amount of starter so you rarely need an extra trip to the store.
- Quick turnaround: active work time is short and total makes in about 45 minutes from start to finish.
- Flexible: use discard or a fed starter; rest at room temperature or slow in the fridge for up to 24 hours.
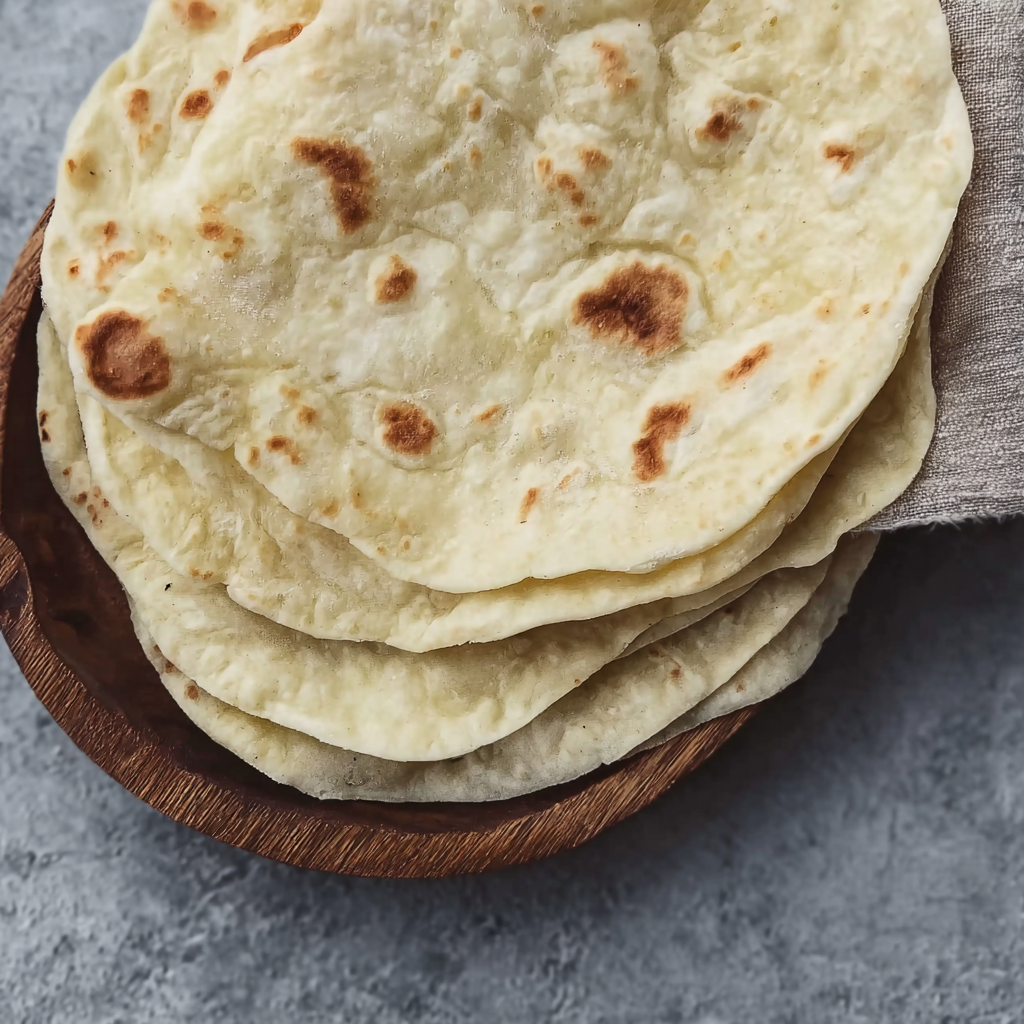
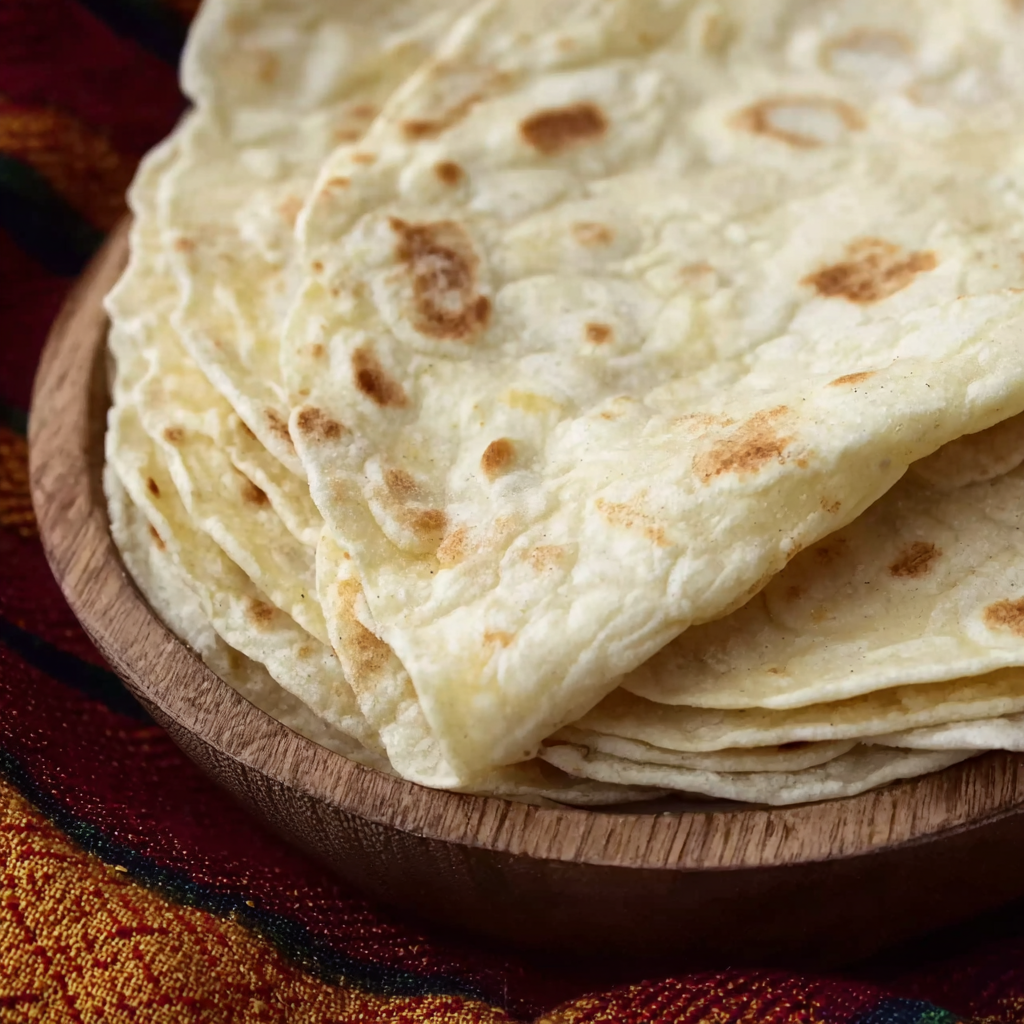
- Thin, tender texture when rolled correctly and nicely charred if you like that smoky flavor.
- Make-ahead friendly: tortillas freeze beautifully and reheat in seconds on a hot pan.
- Kid-friendly and crowd-pleasing for tacos, burritos, and wraps, saving time on busy evenings.
From my experience, family members who normally prefer store tortillas ask for these at least once a week. I remember making a batch before a soccer game and watching everyone form their own tacos at halftime; the tortillas held up beautifully with saucy fillings and still felt fresh the next day when warmed briefly on the skillet.
Ingredients
- Unbleached all-purpose flour: Use 1 1/2 heaping cups. I prefer King Arthur all-purpose for consistent protein and texture; it gives a tender but structured tortilla.
- Kosher salt: 1 1/4 teaspoons. Salt balances the starter tang and enhances gluten development for a better roll.
- Softened butter: 1/4 cup. Butter adds flavor and tenderness; if you want dairy-free, substitute neutral oil or vegan butter.
- Water: 1/3 cup plus 1 tablespoon. Lukewarm water helps incorporate the starter and hydrate the dough without activating it too much.
- Sourdough starter: 1/2 cup. Use discard or fed starter; I use a 100% hydration starter for predictable results. It contributes mild tang and improved keeping quality.
Instructions
Combine dry ingredients:In a medium bowl whisk together 1 1/2 heaping cups all-purpose flour and 1 1/4 teaspoons kosher salt until evenly distributed. This prevents salt pockets and helps even hydration. Use a bowl large enough to fold dough comfortably.Cut in the butter:Add the 1/4 cup softened butter and, using the back of a fork or your fingertips, cut and press the butter into the flour. Work until the mixture resembles coarse crumbs with small pea-sized bits of butter. This step creates pockets that make the tortillas tender and slightly layered.Mix in liquids:Stir in 1/3 cup plus 1 tablespoon lukewarm water and 1/2 cup sourdough starter with a spatula until a shaggy dough forms. The dough should come together without being sticky; if it feels dry add a teaspoon of water at a time. Avoid overworking at this stage to keep tortillas tender.Knead briefly:Turn dough onto a lightly floured surface and knead for 1 to 2 minutes until smooth and elastic. You are aiming for a soft, cohesive ball that is not sticky. Resting relaxes the gluten for easier rolling.Portion and rest:Cut dough into 12 pieces for taco-sized tortillas or six pieces for burrito size. Shape each into a ball, cover with a very light towel or plastic, and rest for 30 minutes at room temperature. For longer planning, refrigerate up to 24 hours—store balls in an airtight container.Roll thin:On a lightly floured surface roll each ball into 6 to 8 inch circles for tacos or 10 to 12 inches for burritos. Roll until you can almost see the counter through the dough; the thinner, the better. Rotate and flip frequently to keep an even thickness.Cook on a hot skillet:Heat a 12-inch nonstick, cast-iron, or crepe pan over medium-high heat until piping hot. Do not add oil. Cook each tortilla 30 to 60 seconds per side; it should puff and show brown spots. If you like char, hold longer. First few tortillas may be pale—adjust heat as the pan equilibrates.Store or serve:Stack cooked tortillas and keep wrapped in a clean kitchen towel to stay soft. Store in an airtight bag at room temperature up to five days or freeze for up to three months. Reheat in a hot skillet or microwave wrapped in a damp towel for best pliability.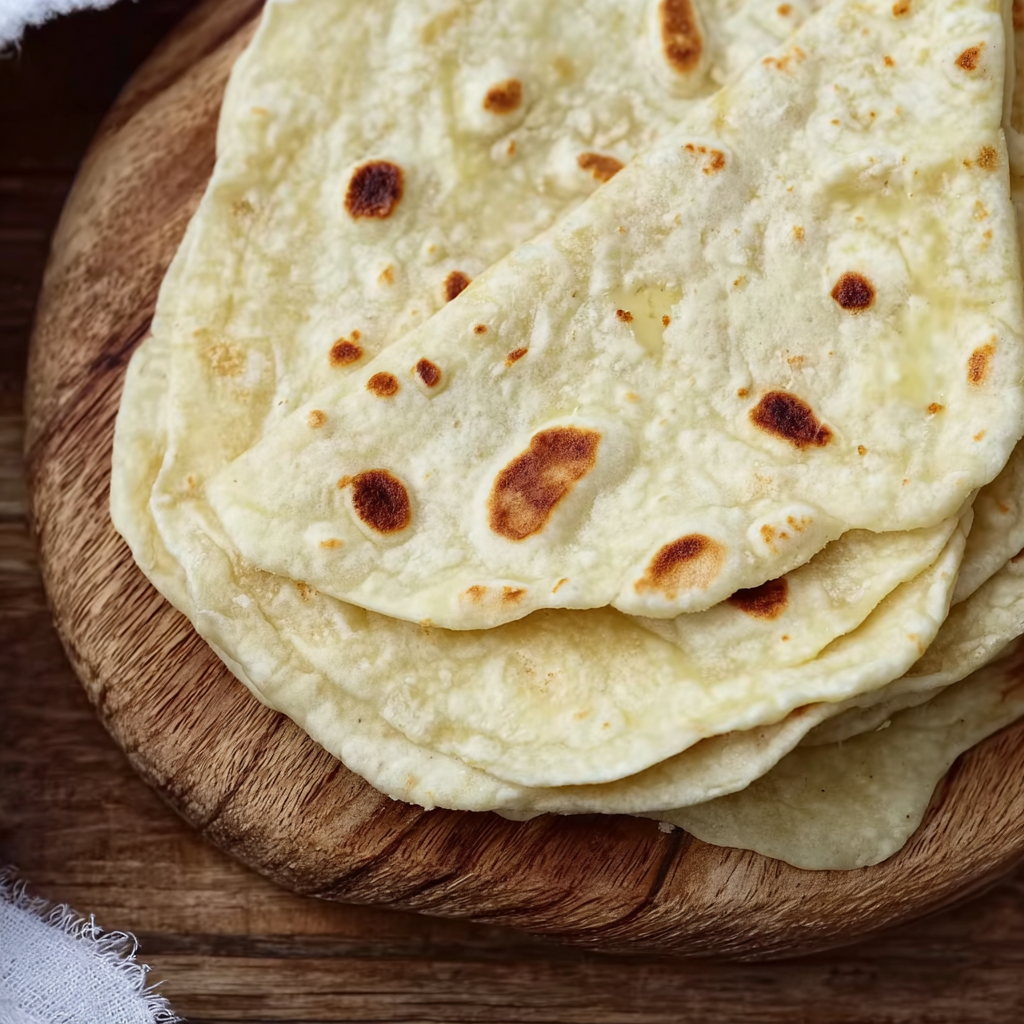
You Must Know
- These hold up well with saucy fillings and reheat beautifully in a hot skillet for 10 to 20 seconds per side.
- Resting tolerances: 30 minutes at room temperature or up to 24 hours in the fridge; fridge rest enhances flavor.
- Freezing: separate with parchment, seal airtight, freeze up to three months; defrost at room temperature and warm before serving.
- Texture: aim for paper-thin rolling for supple tortillas that fold without cracking.
My favorite part is how adaptable the method is. On a busy morning I roll a batch, stack them between parchment, and throw the stack in the freezer. By dinner the tortillas thaw quickly and are almost indistinguishable from fresh. My partner still raves about the softness when I cook them on a well-seasoned cast-iron skillet—the little charring bits bring everything together.
Storage Tips
To keep the tortillas soft store them wrapped in a clean towel inside an airtight container at room temperature for up to five days. For longer storage, stack with parchment between each piece, place in a freezer bag, press out excess air and freeze for up to three months. When reheating from frozen, thaw at room temperature for 20 to 30 minutes then warm on a hot skillet for about 20 seconds per side, or microwave wrapped in a damp paper towel for 20 to 30 seconds to restore pliability. Discard any with off smells or visible mold.
Ingredient Substitutions
If you need to omit butter, use 1/4 cup neutral oil such as vegetable or avocado oil; the texture will be slightly different but still tender. For a dairy-free alternative use vegan butter in equal amounts. If you want whole wheat tortillas, substitute up to half the flour with whole wheat flour but expect a denser result and reduce rolling thinness slightly. For gluten-free you will need a specialized flour blend and xanthan gum; results will vary and require recipe-specific testing. The sourdough starter can be fed or discard; use 1/2 cup either way.
Serving Suggestions
Serve warm with grilled meats, roasted vegetables, or scrambled eggs. For a bright contrast, add lime wedges, chopped cilantro and thinly sliced radishes. These tortillas make excellent fish tacos with a simple slaw, or use them as wraps for leftover roasted chicken and avocado. For a quick snack, spread with refried beans, cheese and heat until the cheese melts. Garnish with flaky salt for a tactile finish and offer pickled onions for acidity.
Cultural Background
Flour tortillas have a long history in northern Mexico and the southwestern United States where wheat flour was more accessible than corn. Traditional recipes often use lard or oil for tenderness; this version uses butter and a touch of sourdough starter for flavor. Adding sourdough is a modern twist that brings slight tang and improved keeping qualities. Regional variations include larger, thinner tortillas for burritos or smaller thicker ones for certain street tacos.
Seasonal Adaptations
In spring and summer pair tortillas with grilled seasonal vegetables, fresh corn, and citrus-based salsas. In autumn and winter serve warm tortillas with slow-cooked stews or roasted winter squash. You can fold in finely chopped herbs like cilantro or chives in the dough for a seasonal flair, or add a pinch of smoked paprika or cumin for a smoky edge during colder months.
Meal Prep Tips
Make dough in the evening and refrigerate the portioned balls for up to 24 hours to develop flavor and make morning cooking faster. Roll a large batch, separate with parchment, and freeze in stacks of six to twelve; pull a stack as needed. When packing lunches, wrap a few warm tortillas in foil and place inside an insulated container to keep them pliable until mealtime. Use reusable silicone bags for freezer storage to reduce waste.
These tortillas are simple, dependable, and a little celebratory when you make them from starter discard. I hope they become your go-to for tacos, wraps and quick dinners that feel just homemade enough to matter.
Pro Tips
Roll the dough as thin as possible for soft, pliable tortillas that fold without cracking.
Heat the skillet until it's piping hot; the first few tortillas may be pale while the pan reaches temperature.
Stack cooked tortillas and keep wrapped in a towel to maintain steam and softness.
If dough is sticky, dust sparingly with flour; too much flour makes tortillas dry and stiff.
This nourishing sourdough flour tortillas (made with discard or not) recipe is sure to be a staple in your kitchen. Enjoy every moist, high protein slice — it is perfect for breakfast or as a wholesome snack any time.
Tags
Sourdough Flour Tortillas (Made With Discard or Not)
This Sourdough Flour Tortillas (Made With Discard or Not) recipe makes perfectly juicy, tender, and flavorful steak every time! Serve with potatoes and a side salad for an unforgettable dinner in under 30 minutes.
Ingredients
Dough
Instructions
Combine dry ingredients
In a medium bowl whisk together flour and salt until evenly distributed to prevent pockets of salt and ensure even hydration.
Cut in the butter
Add softened butter and use a fork or fingertips to blend into the flour until mixture resembles coarse crumbs with pea-sized bits of butter.
Mix in liquids
Stir in lukewarm water and sourdough starter until a shaggy dough forms, then bring together gently with hands to form a rough ball.
Knead briefly
Turn onto a lightly floured surface and knead 1-2 minutes until smooth and elastic; avoid overworking to keep tortillas tender.
Portion and rest
Cut into 12 pieces for tacos or 6 for burritos, shape into balls, cover lightly and rest 30 minutes at room temperature or refrigerate up to 24 hours.
Roll thin
Roll each ball into 6-8 inch circles for tacos or 10-12 inches for burritos, rolling until nearly translucent for the best tenderness.
Cook on a hot skillet
Heat a 12-inch skillet until very hot, place tortilla without oil, cook 30-60 seconds per side until puffed and brown spots appear; adjust time for desired char.
Store or serve
Stack cooked pieces wrapped in a towel to stay soft, store airtight at room temperature up to 5 days or freeze up to 3 months.
Last Step: Please leave a rating and comment letting us know how you liked this recipe! This helps our business to thrive and continue providing free, high-quality recipes for you.
Nutrition
Did You Make This?
Leave a comment & rating below or tag
@kitchenfunwithmy3sons on social media!
Categories:
You might also like...
Cheesy Ranch Oven Roasted Potatoes
Golden baby potatoes roasted until crisp and tossed in ranch seasoning, Parmesan, and melty cheddar — an easy, crowd-pleasing side that’s ready in under an hour.

Strawberry Dirty Sprite Drink
A fizzy blend of strawberry syrup, fresh lime, and lemon-lime soda, served chilled with vibrant garnishes for the ultimate refreshing beverage — boozy or not.
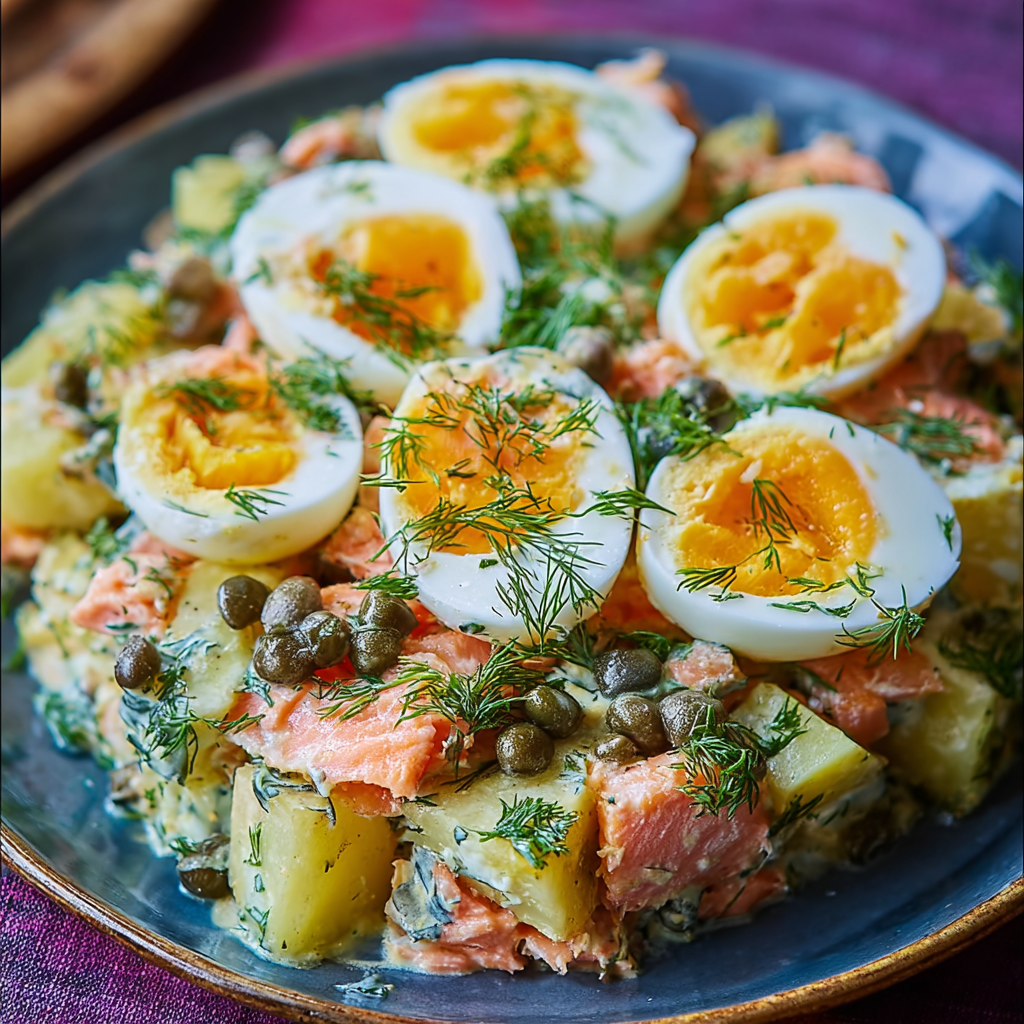
Russian Salmon Potato Salad with Eggs, Dill & Capers
A satisfying Russian-style salad combining seared salmon, tender baby potatoes, soft-boiled eggs, dill, capers and gherkins — perfect for light lunches or a weekend gathering.
Did You Make This?
Leave a comment & rating below or tag @kitchenfunwithmysons on social media!
Rate This Recipe
Share This Recipe
Enjoyed this recipe? Share it with friends and family, and don't forget to leave a review!
Comments (1)
This recipe looks amazing! Can't wait to try it.
Comments are stored locally in your browser. Server comments are displayed alongside your local comments.

Hi, I'm Katie!
What's Popular

30-Minute Meals!
Join to receive our email series which contains a round-up of some of our quick and easy family favorite recipes.